
There are many factors involved in creating and selling NFTs. First, you need to have a digital piece of art or collection to turn into an NFT. Next, you need to decide on a platform to mint and sell it. Every platform works with a unique crypto wallet and cryptocurrency.
In order to make money from an NFT, it has to be minted. Some platforms, such as OpenSea, allow for lazy minting. This means that your item is visible to potential buyers who can make an offer. Once you accept their offer, you will have to go through the minting process, which costs money that needs to be paid via cryptocurrency.
While lazy minting doesn’t require much, it doesn’t let you set a price or auction your NFT. To do that, you need to go through the minting process, which costs money. This is known as paying gas fees, which can be pretty steep. To pay these fees, you need to validate your identity with a driving license, use a debit card (not a credit card) and buy cryptocurrency via your crypto wallet. Only then can you officially sell your NFT.
There are different approaches to creating, minting, and selling NFTs. In this article, I will show you one of the simplest ways to do it. The next section will teach you how to create them on your iPhone or iPad to sell on the OpenSea crypto art platform, step by step. Or, save money and buy these inexpensive handmade crypto earrings instead!


How to Make Your Own NFT on OpenSea: Step By Step
The following steps will teach you how to create NFTs from start to finish!
1. Create the Art You Wish to Turn into an NFT.
The first step is to create art if you haven’t already. OpenSea lets you turn any art into an NFT as long as it is formatted as a gif, jpg, png, svg, mp4, mp3, WebM, wav, glb, ogg, or gltf and is less than 100 MB in size.
There are many ways to create art on your iPhone or iPad. You can use an art app, take a photo or video, scan art that you’ve physically drawn on paper, or record audio of a song, poem, or other auditory content.
Keep in mind that if you are using multimedia, you’ll also need to create a still image or gif thumbnail for it. In my example, I will use a .mp4 file, and I’ll cover how to create a gif for it in seconds using the Shortcut app on your iPhone.
2. Download & Set Up the Necessary Apps
While there are other platforms and crypto wallets, in this example, I will be using OpenSea and MetaMask:
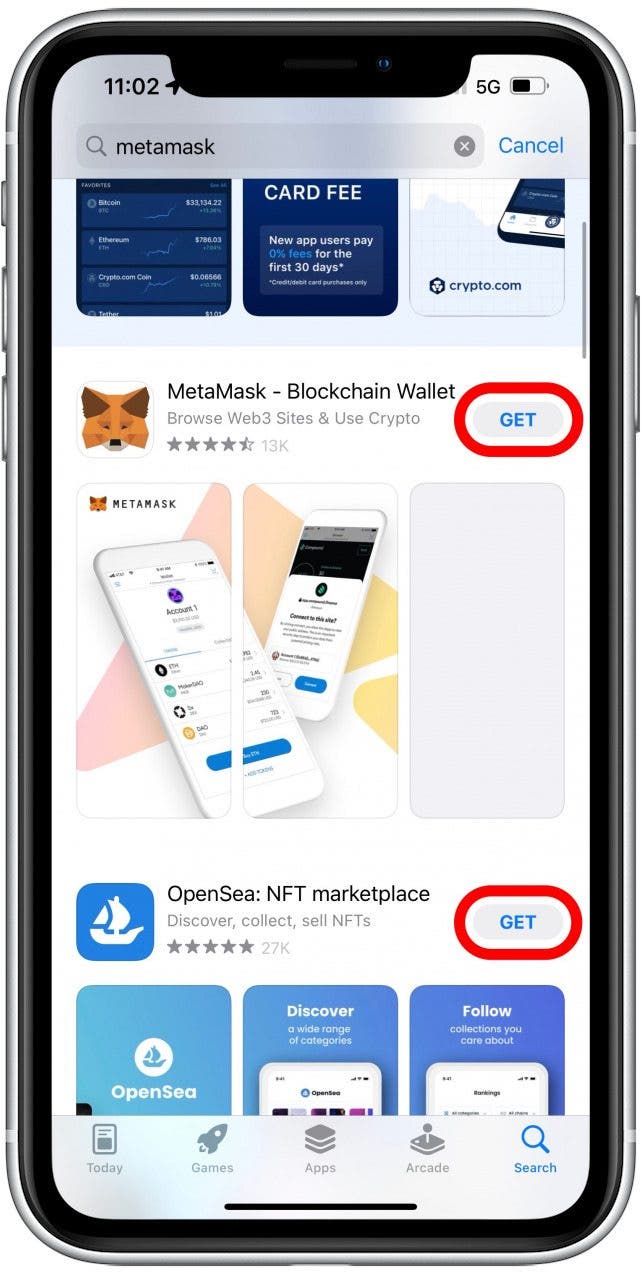
- Download the free MetaMask and OpenSea apps from the App Store.
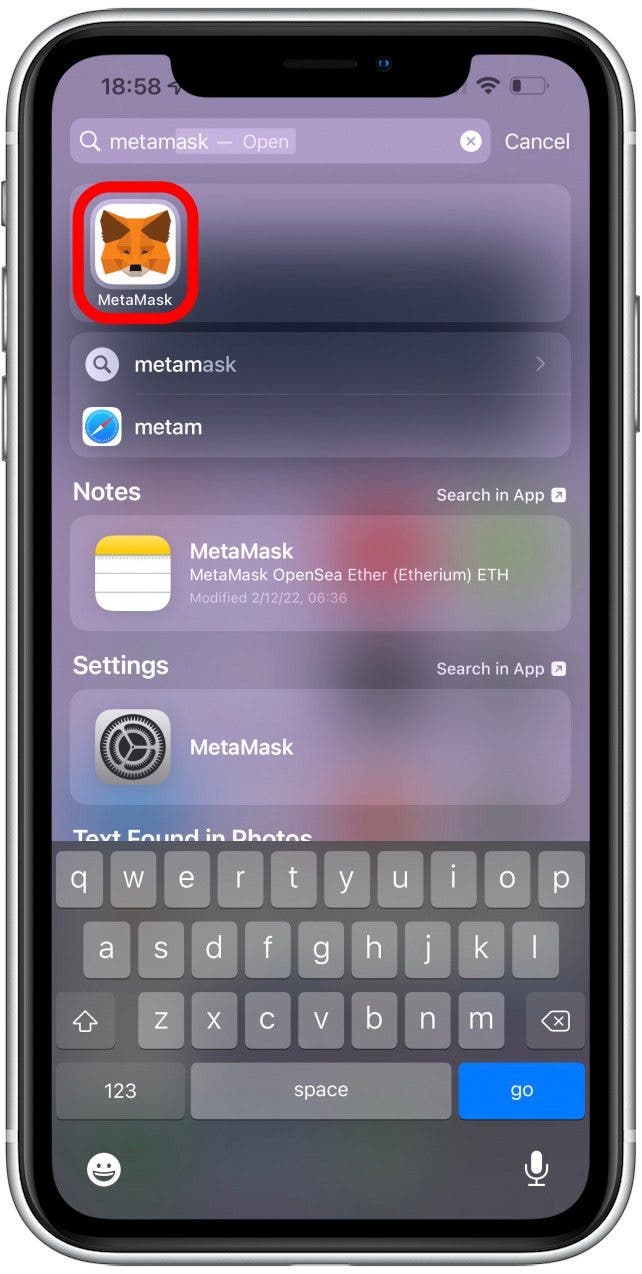
- First, open MetaMask.
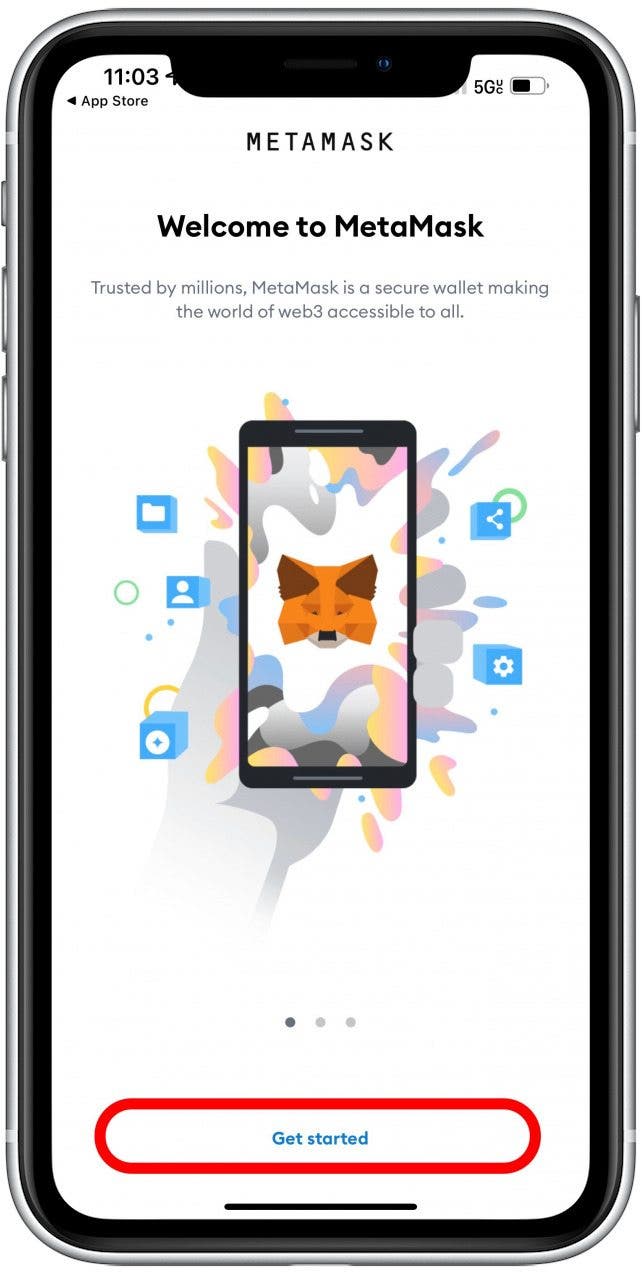
- Tap Get started.
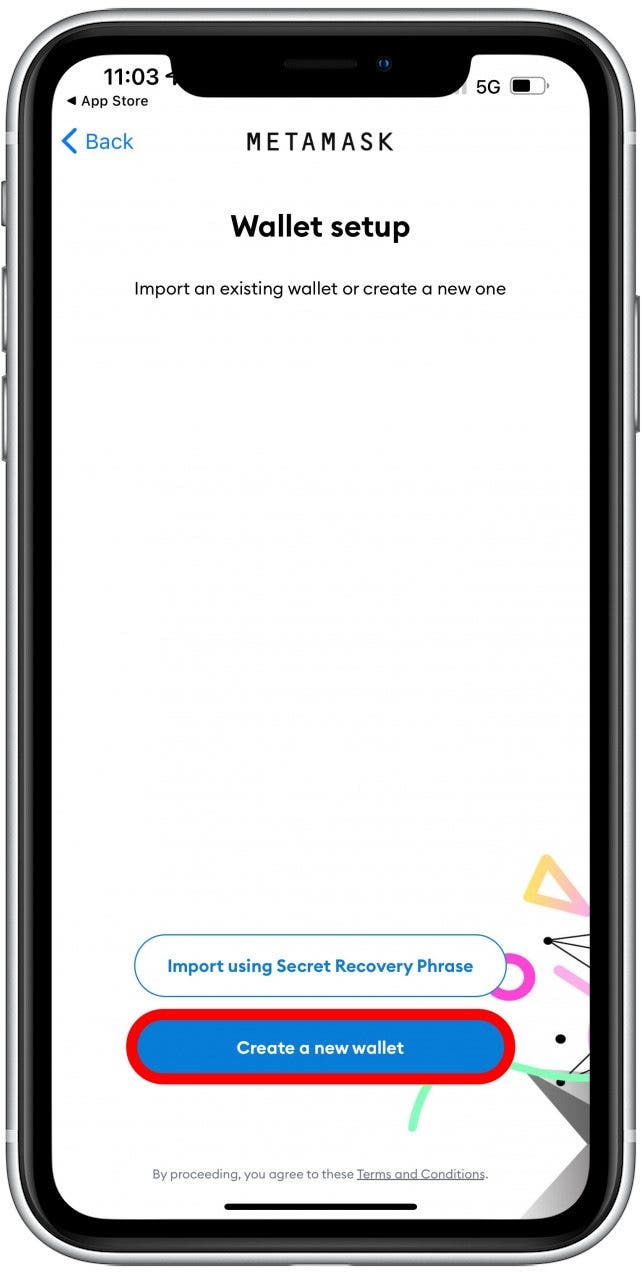
- Select Create a new wallet.
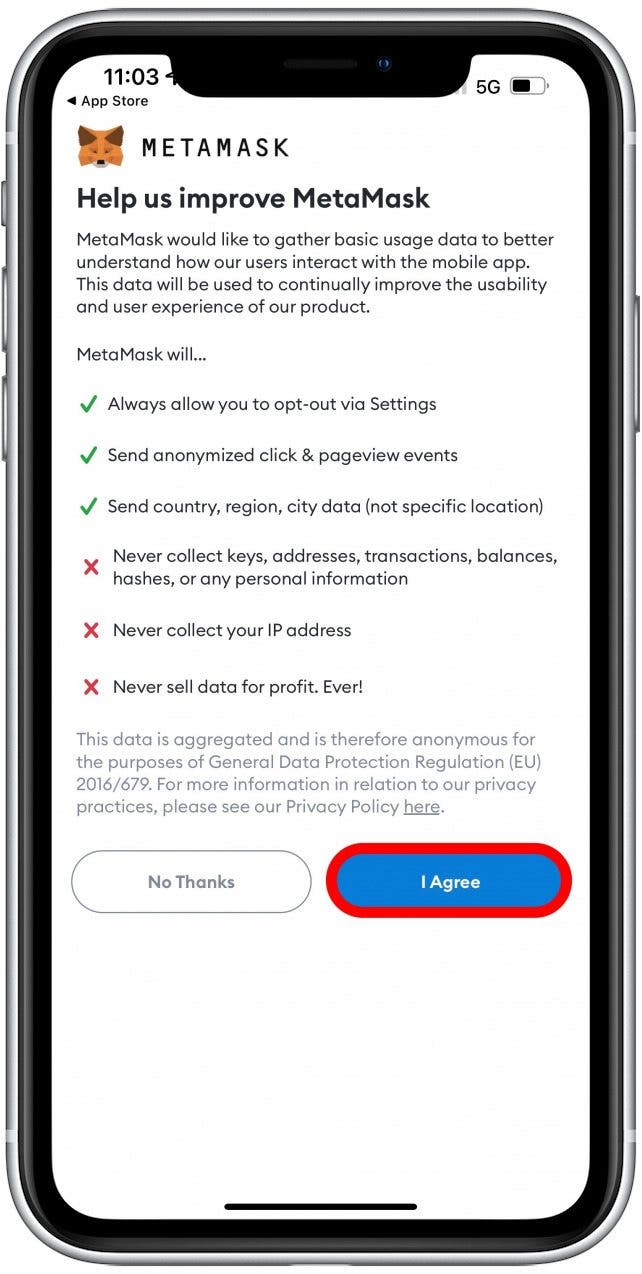
- Read the terms and conditions, then tap I Agree.
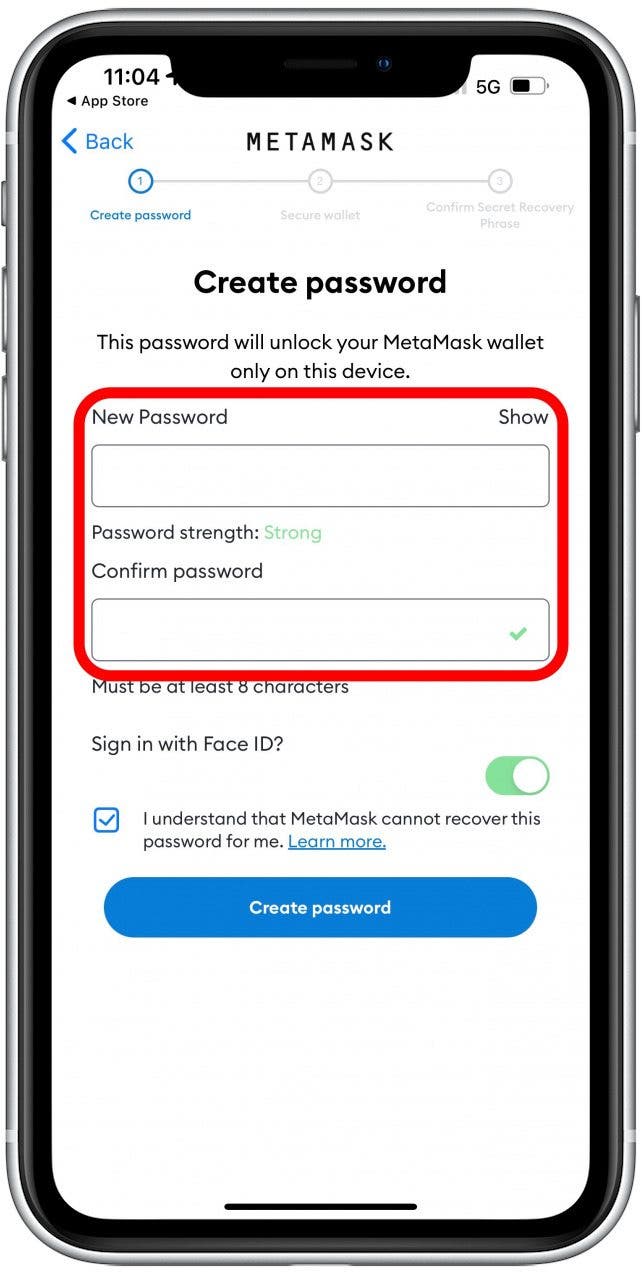
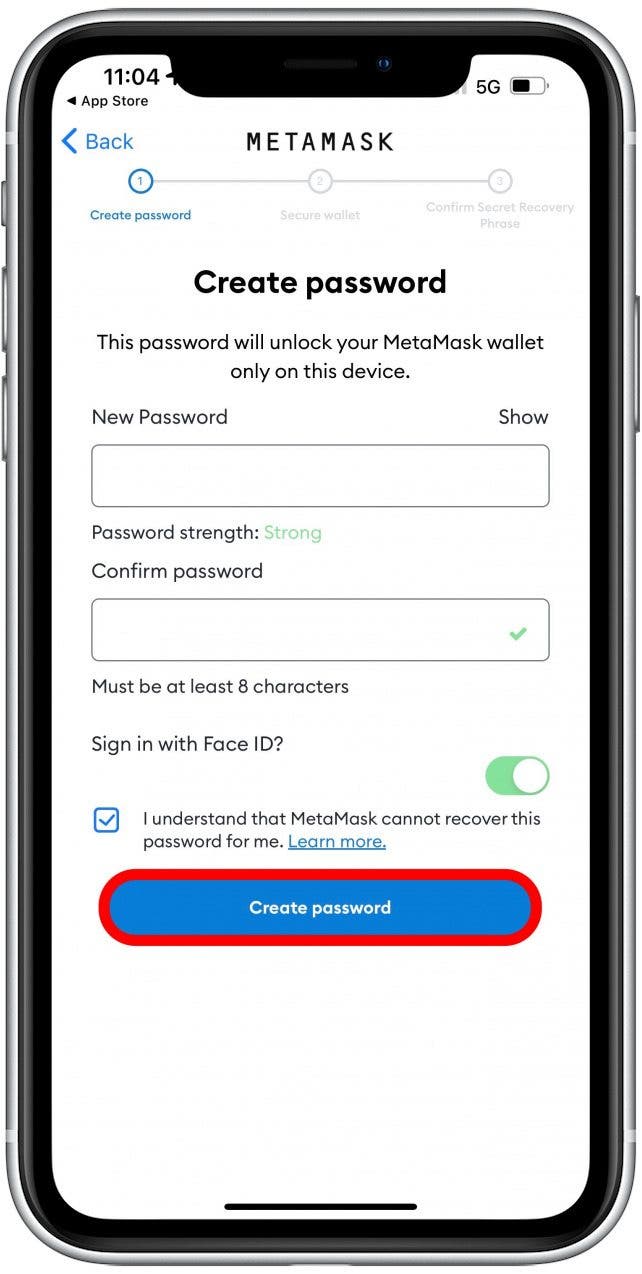
- Create a secure password that you won’t forget and type it under New Password and Confirm password.
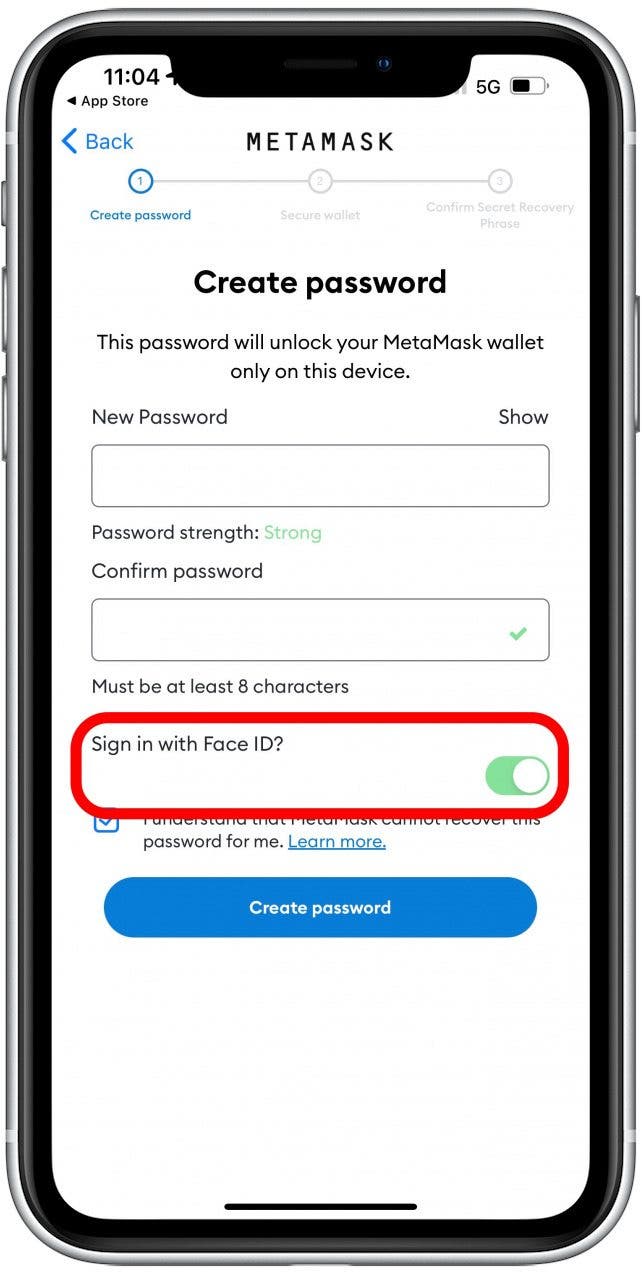
- I like to keep Sign in with Face ID because repeatedly typing in the password can get frustrating, but it can be safer to toggle it off.
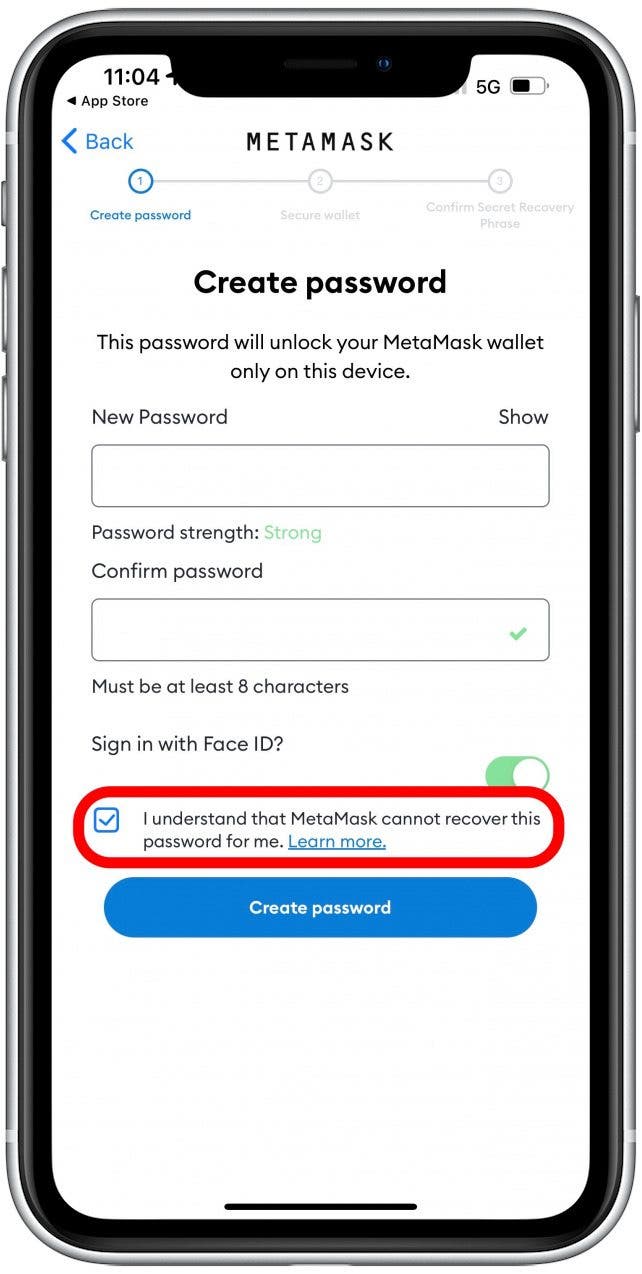
- Check the box to confirm that you understand that MetaMask cannot recover the password for you. If you forget the password or lose your Secret Recovery Phrase, you won’t be able to get access to your wallet or any money in it.
- Tap Create password.
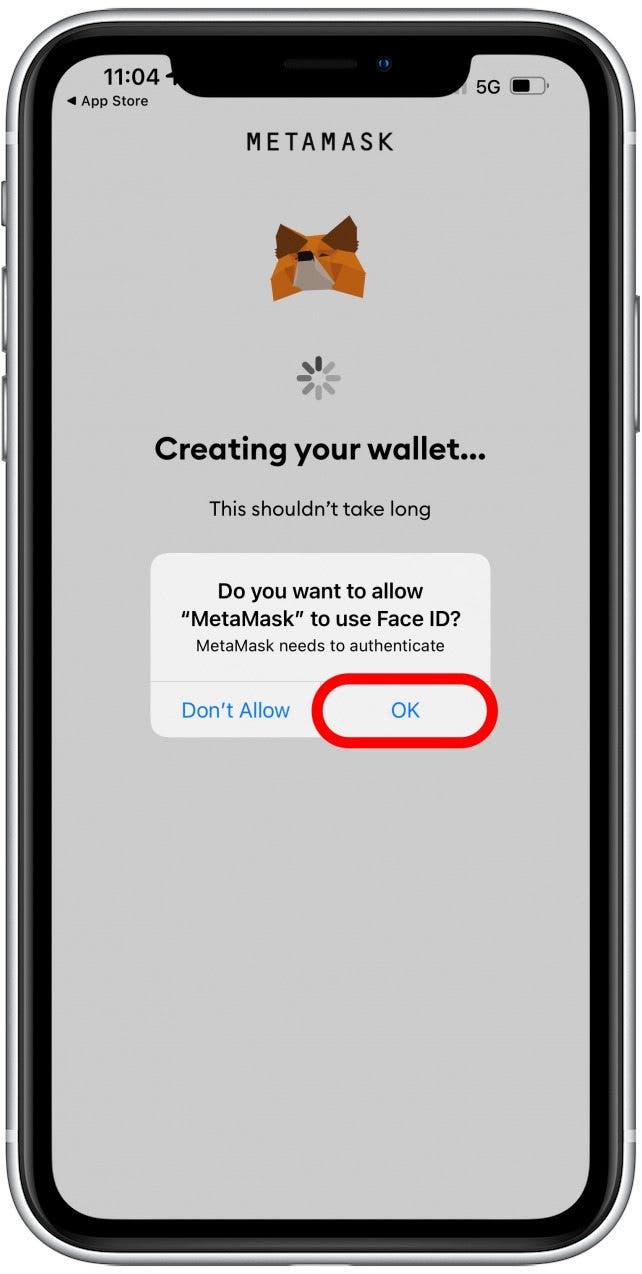
- If you left Sign in with Face ID toggled on, you’ll be asked to allow MetaMask to use Face ID. Tap OK.
- Watch the short video on how to secure your wallet.
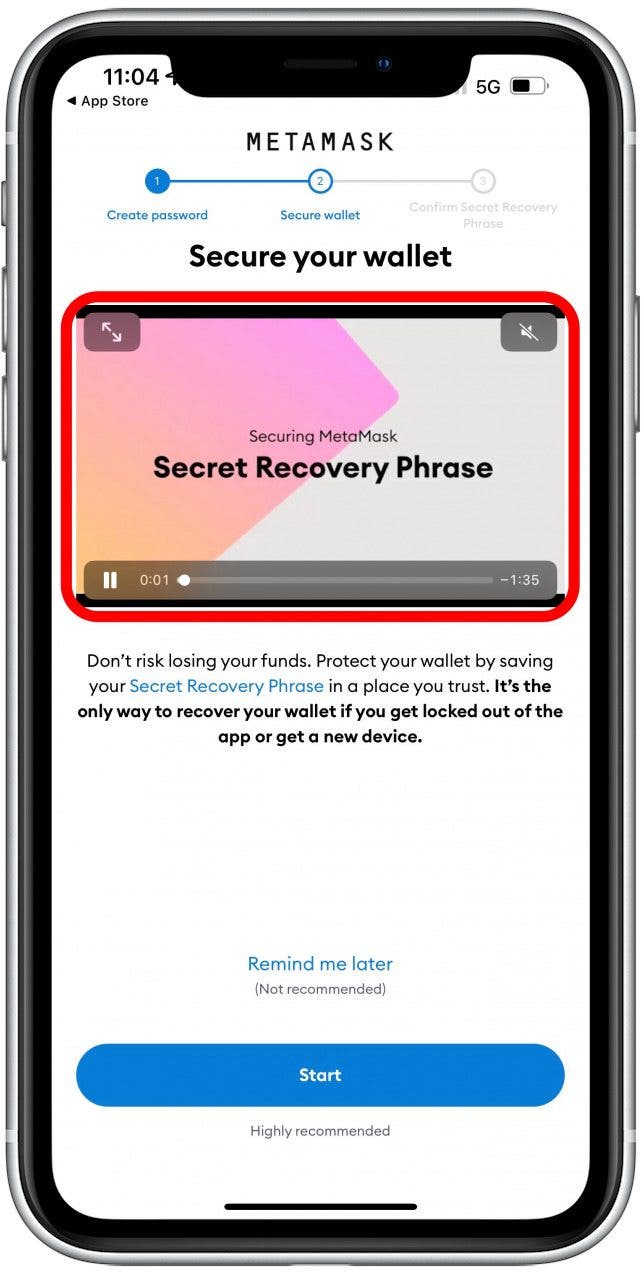
- Tap Start.

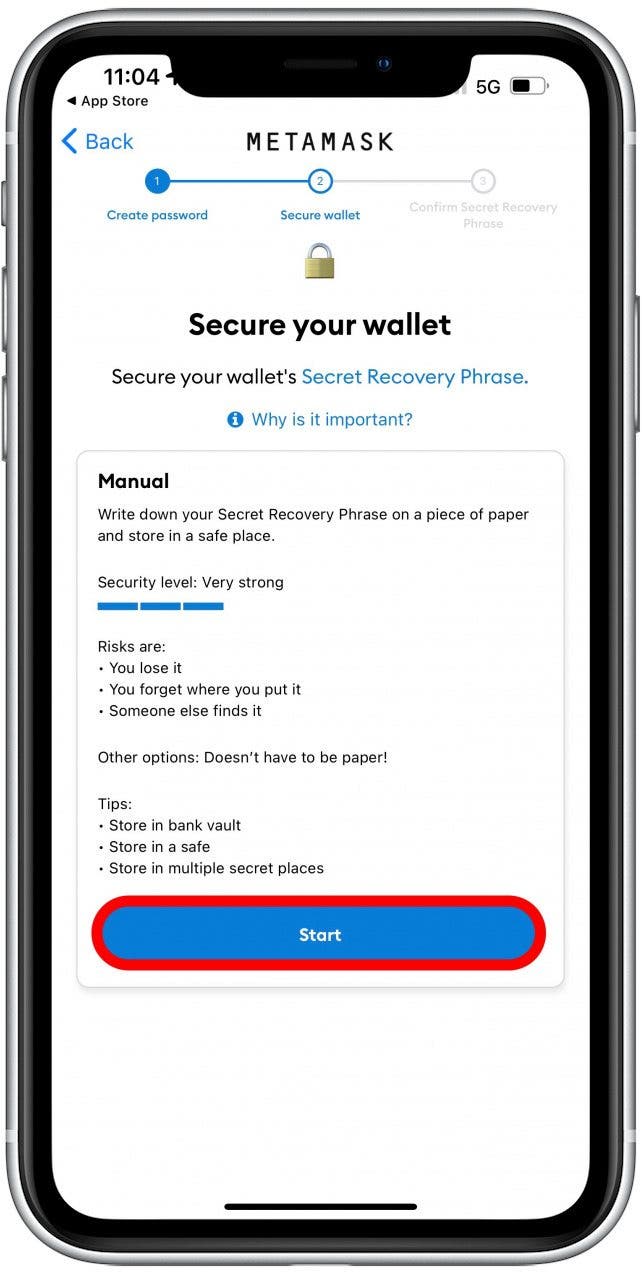
- Tap Start again.
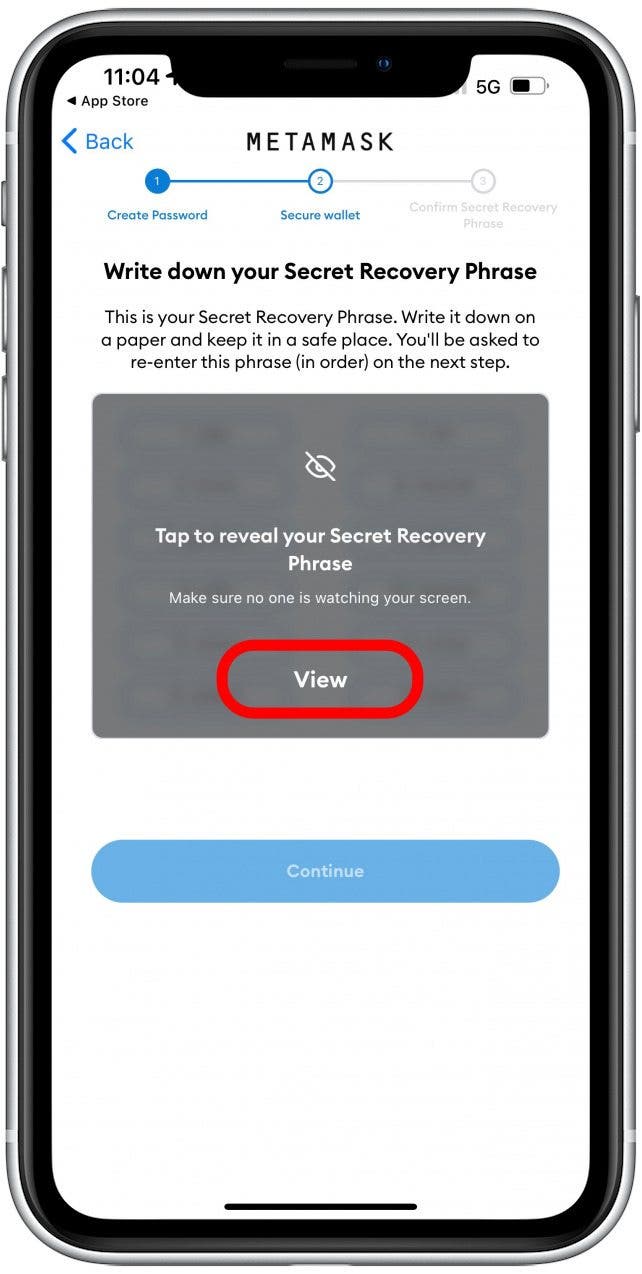
- Tap View to reveal your Secret Recovery Phrase.
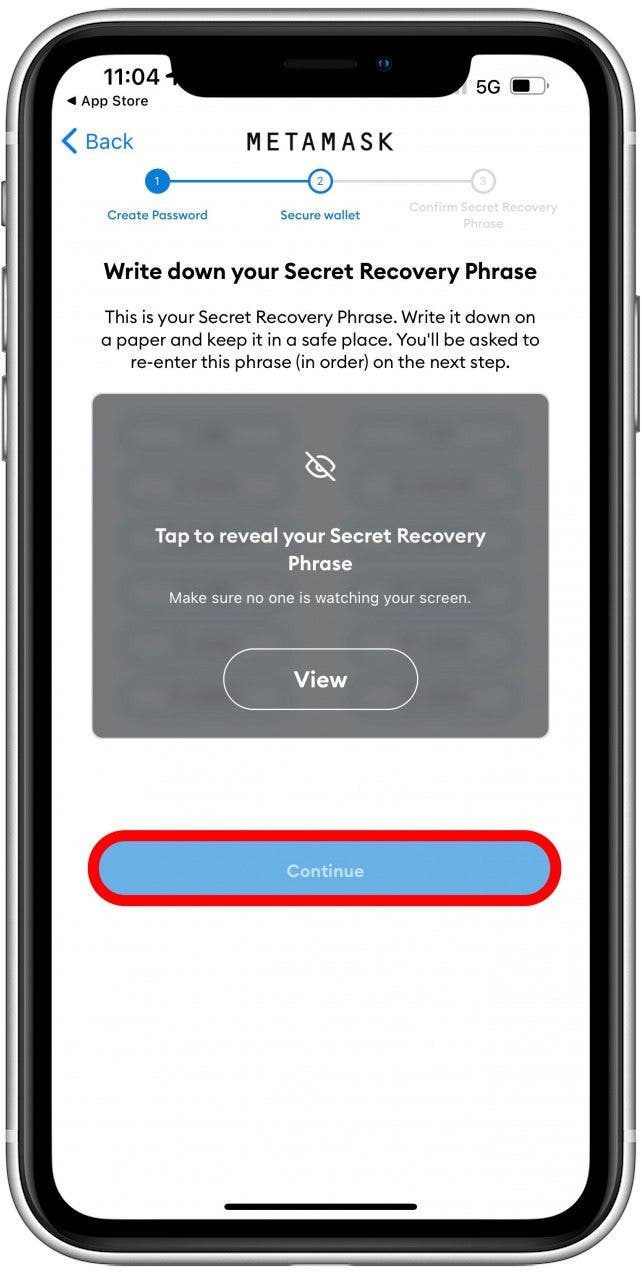
- Use your preferred method of remembering it. You have to make sure you won’t forget it or lose it. Tap Continue.
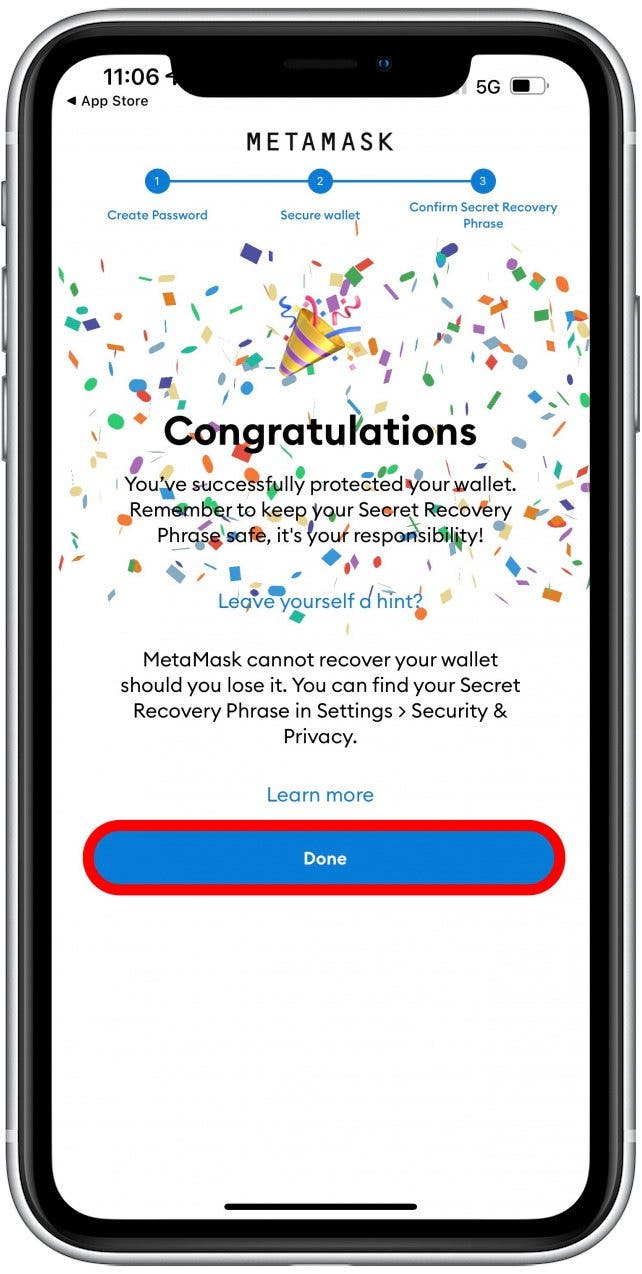
- Follow the on-screen directions to enter your Secret Recovery Phrase. You’ll get a Congratulatory message once you’re finished. You can tap Leave yourself a hint if you wish to have a hint to refer to in the future.

- Tap Done when you are finished.
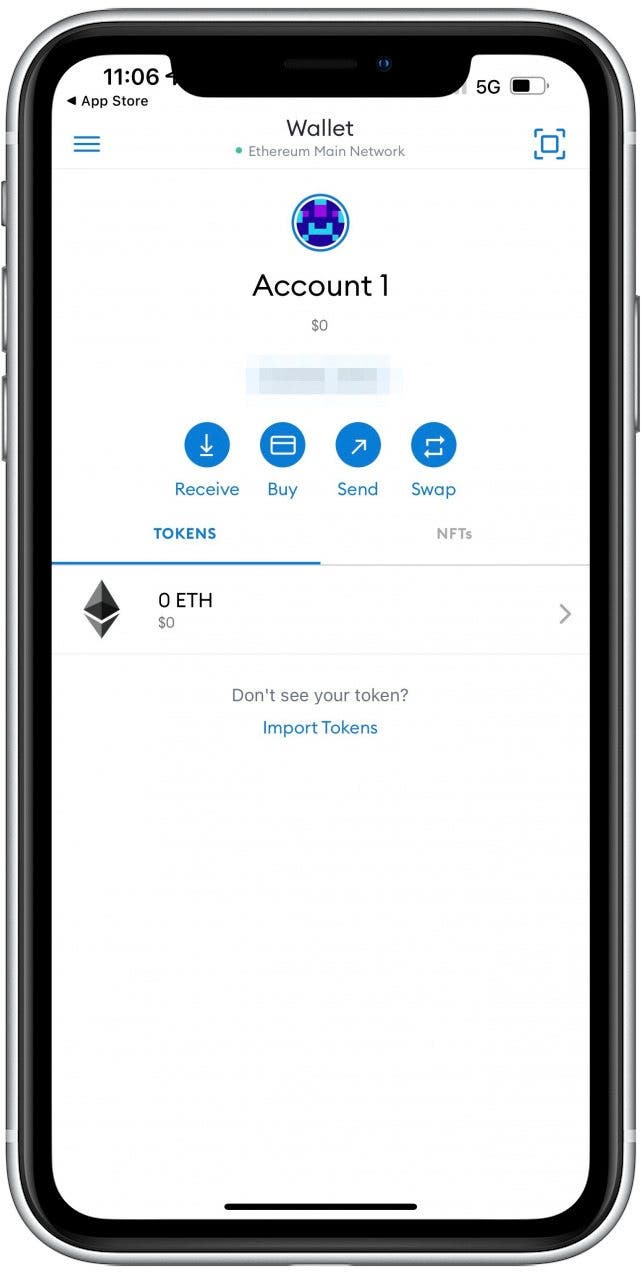
- Your wallet has been created!
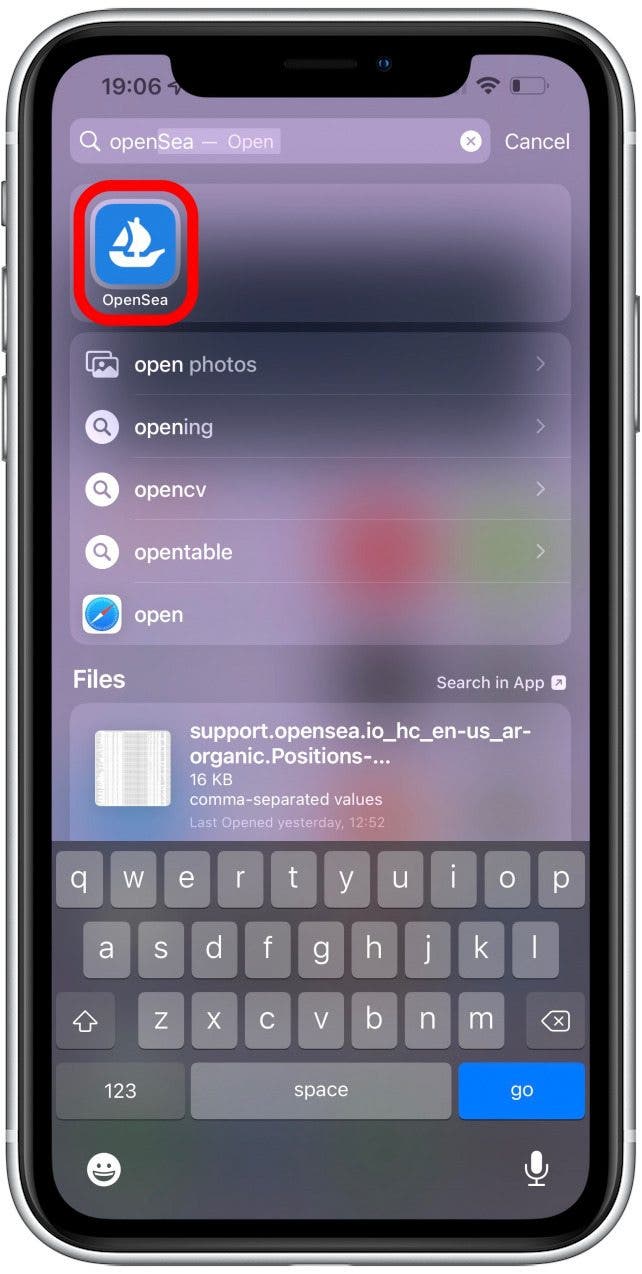
- Next, you have to set up your OpenSea account. Open the OpenSea app to begin.
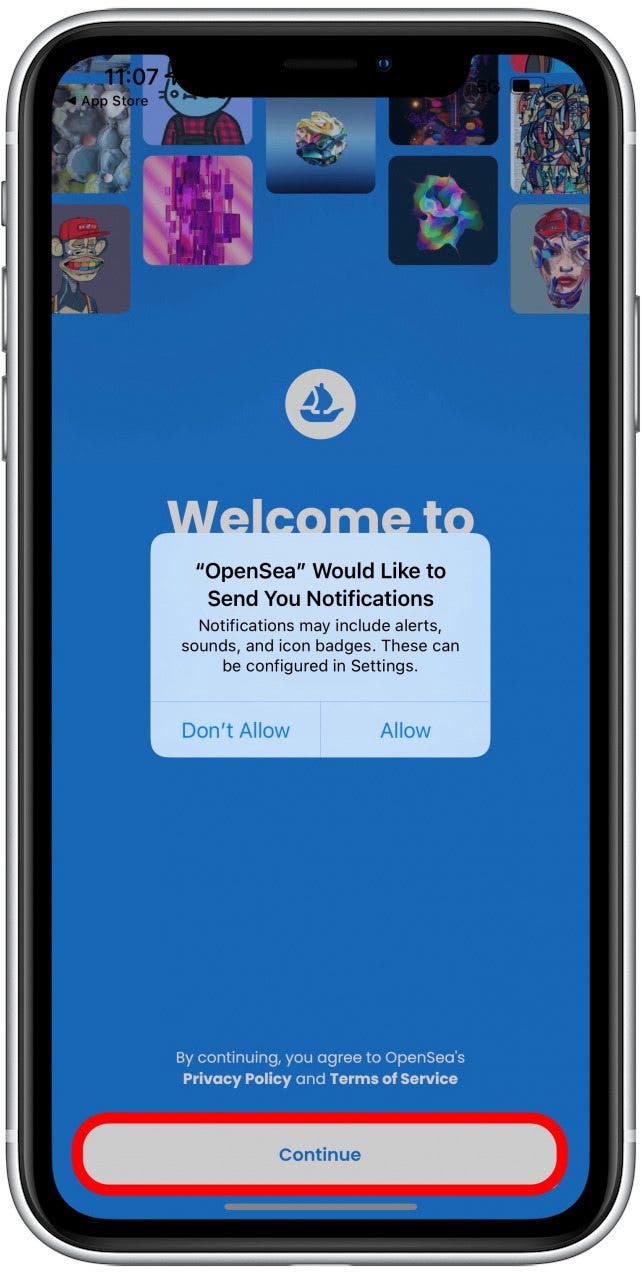
- Tap Allow if you want to receive OpenSea notifications, or Don’t Allow if you wish to opt-out. You can change this later on if necessary.

- Tap on Privacy Policy and Terms of Service to read all the terms and conditions. If you don’t agree with these, you won’t be able to use the app. Tap Continue if you wish to proceed.
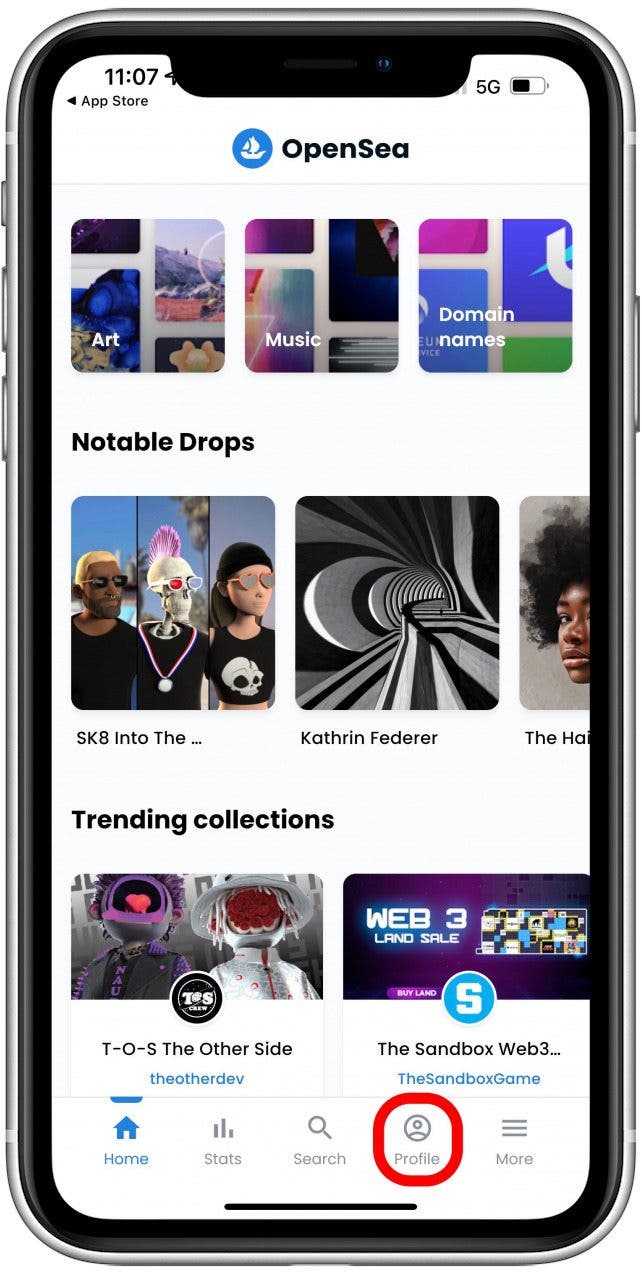
- Tap Profile.
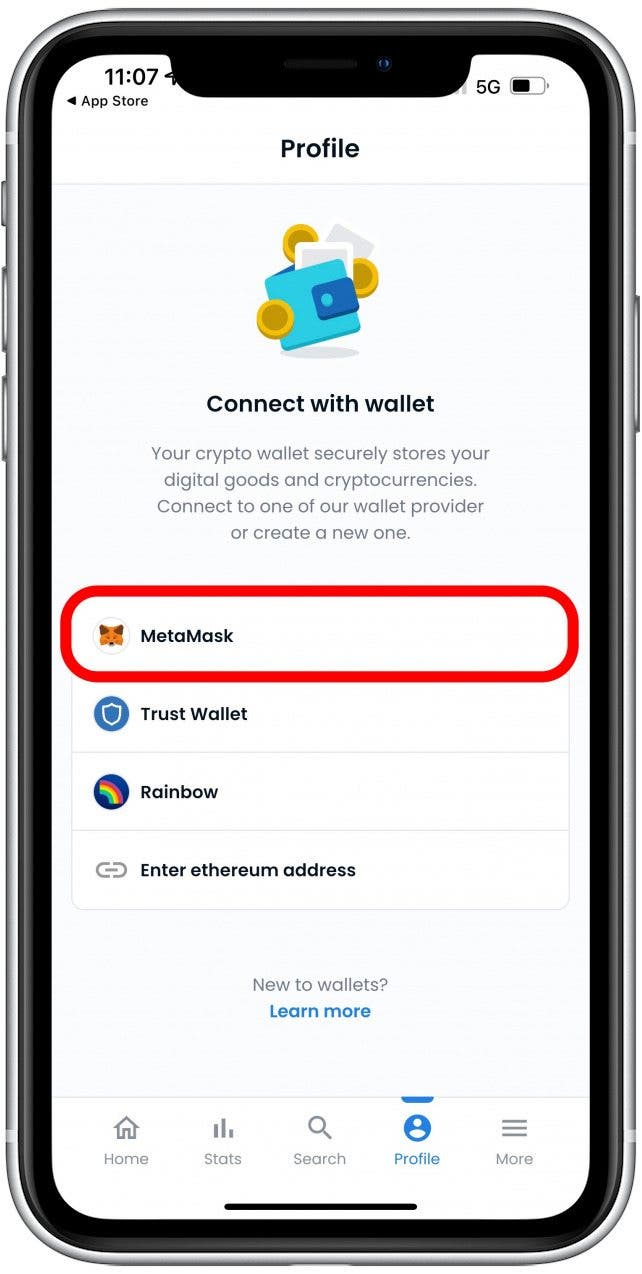
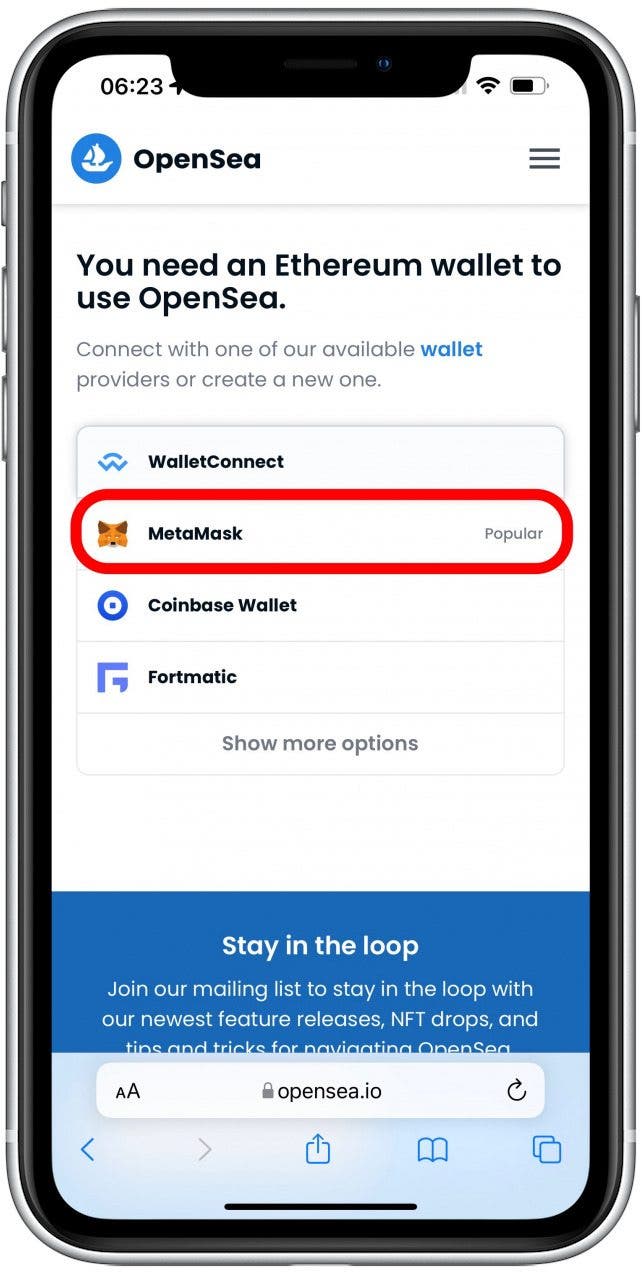
- You’ll have to connect to a crypto wallet. Tap MetaMask.
- You should see the account you just set up to auto-populate, or you can copy-paste it from your MetaMask settings. Tap Connect.

- You will see confirmation that you are connected.
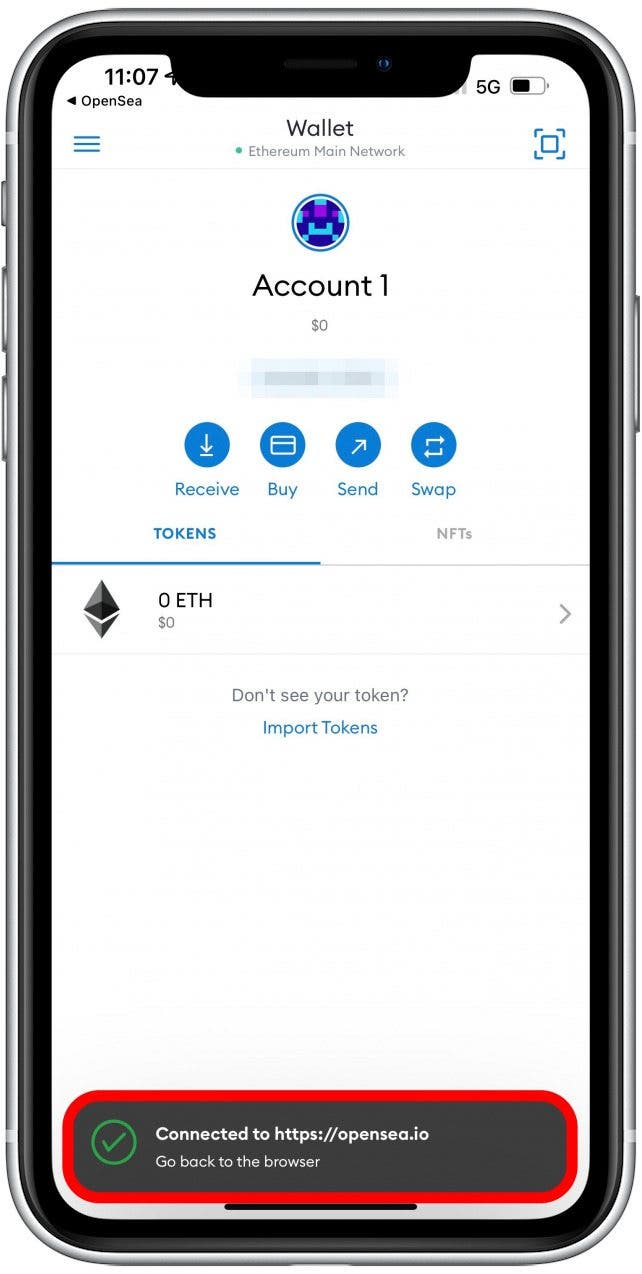
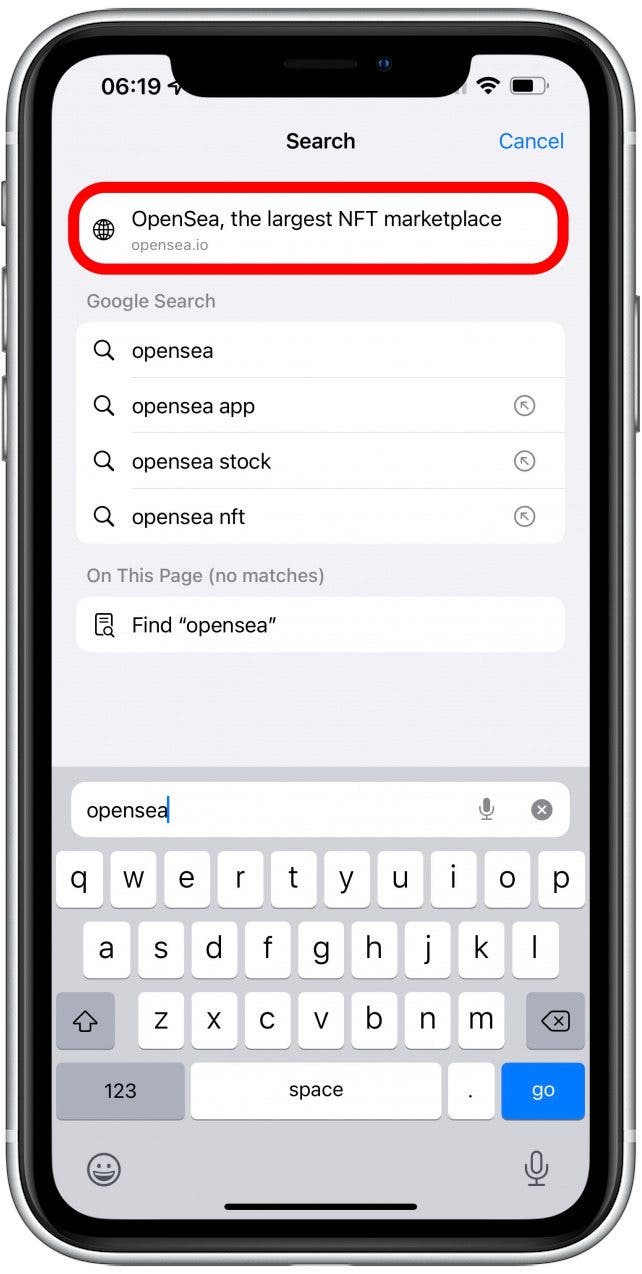
- Go to https://opensea.io.
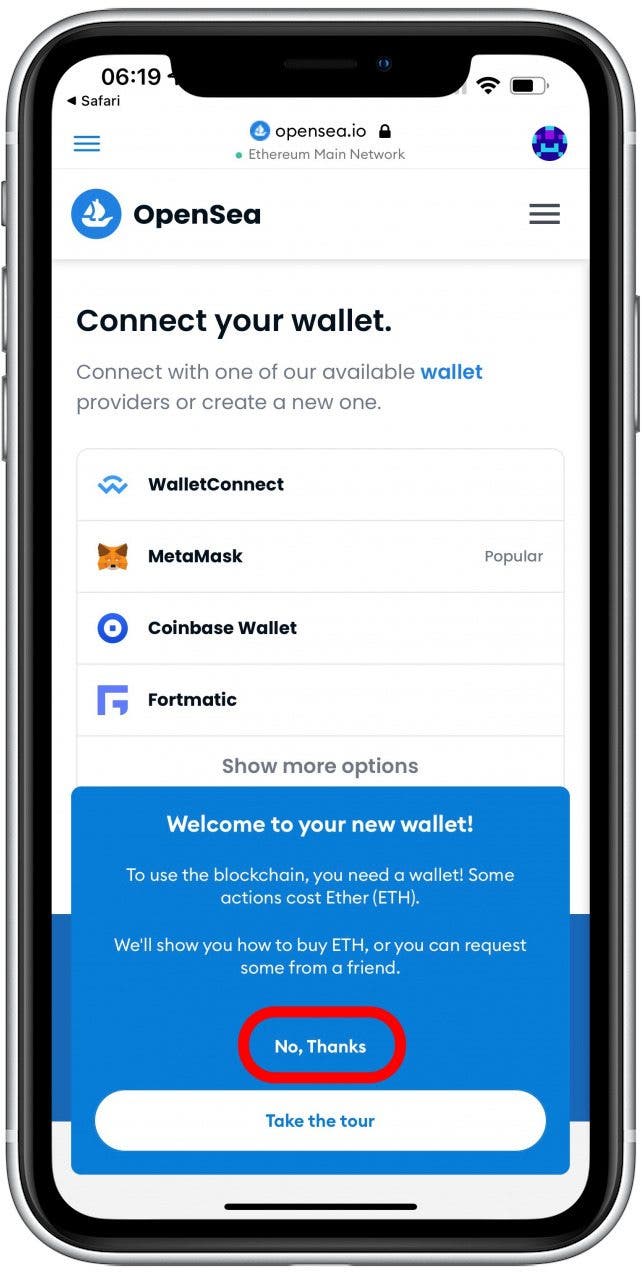
- You should already see your wallet icon in the top right corner and a welcome to your new wallet announcement. Consider tapping Take the tour to learn how to use OpenSea. Tap No, Thanks to skip this step.
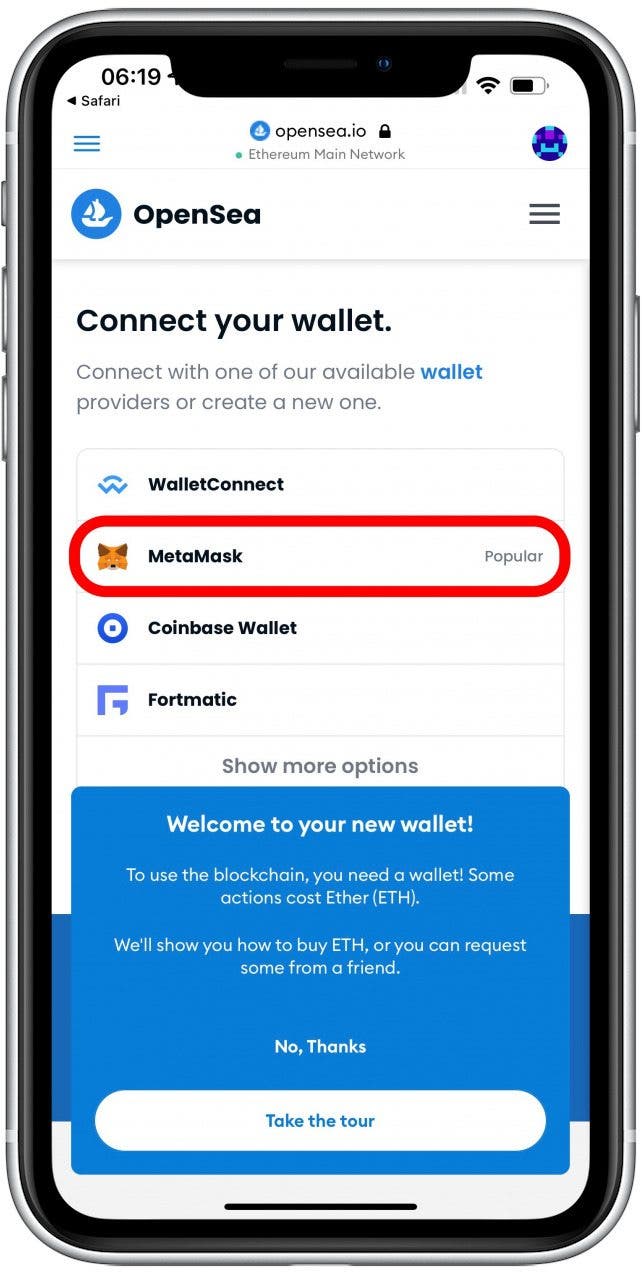
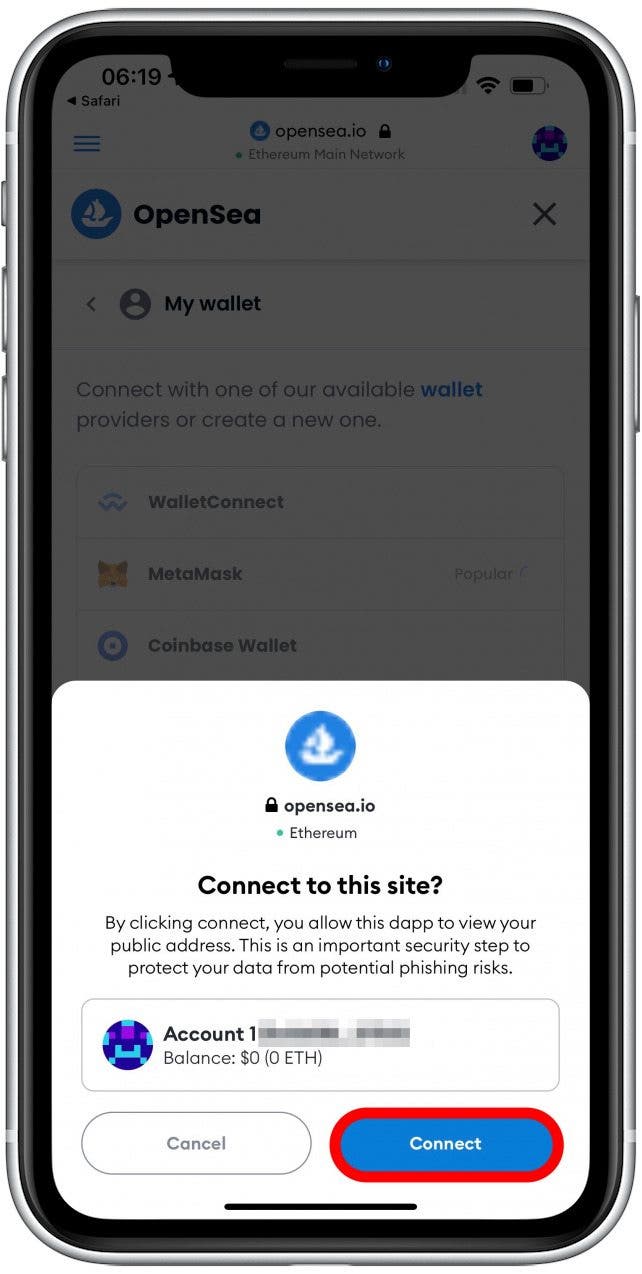
- Tap MetaMask. You’ll be prompted to enter your password or your face will be scanned.
- Tap Connect.
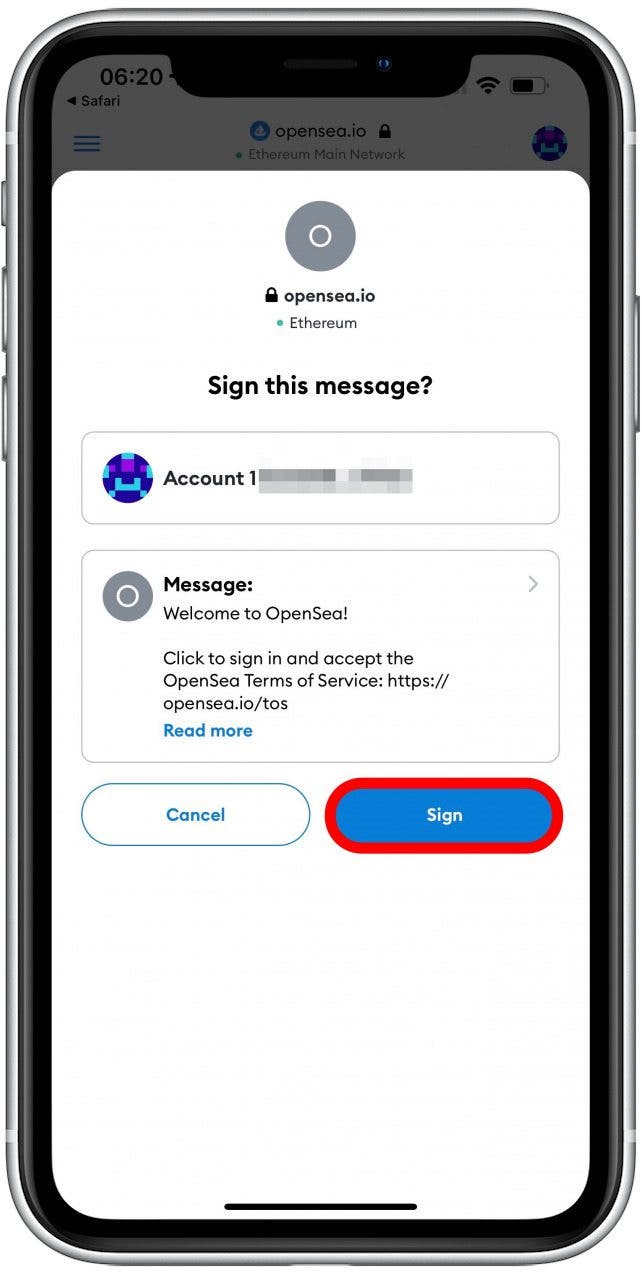
- Tap read more to make sure you know what you are agreeing to. If you agree, tap Sign.
Your accounts are all set up! So far, you don’t have any cryptocurrency in your account, and that’s okay. First, I’ll show you how to create an NFT for free. This is referred to as lazy minting. I will discuss the pros and cons in section four.
3. Create Your First NFT
Now that you have selected your art and your OpenSea and MetaMask accounts are set up, you are ready to create your first NFT!
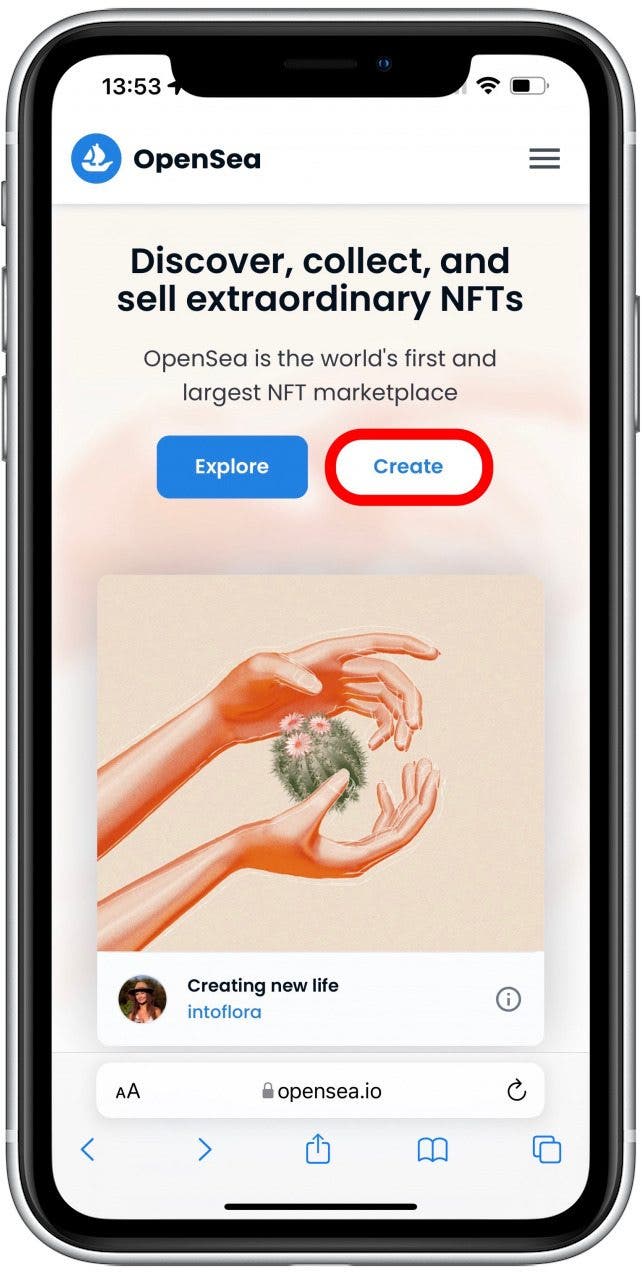
- Go to https://opensea.io.
- Tap Create.
- Tap MetaMask. You’ll be prompted again to enter your password or have your face scanned.
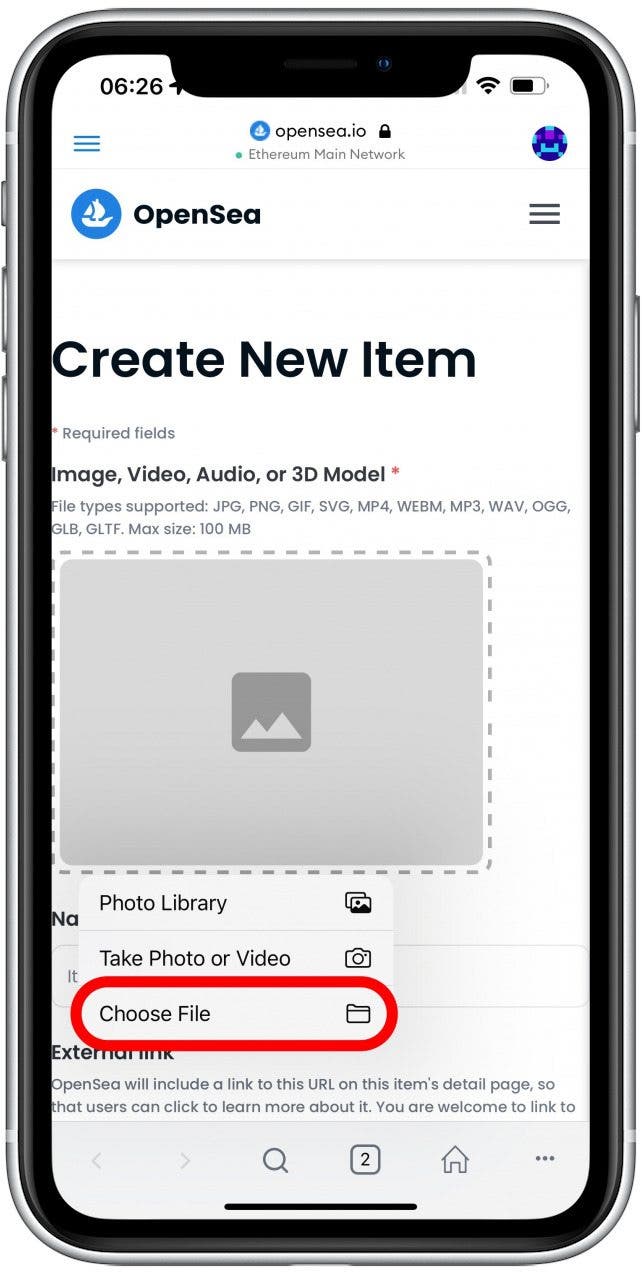
- You’ll be taken to a Create New Item page. Tap the image icon.

- Select the location of the file. If you are using a video, save the .mp4 file to Files. Any file from your Photos app will be a QuickTime movie which isn’t a supported format. I will tell you more in the Video NFT Tips section below.
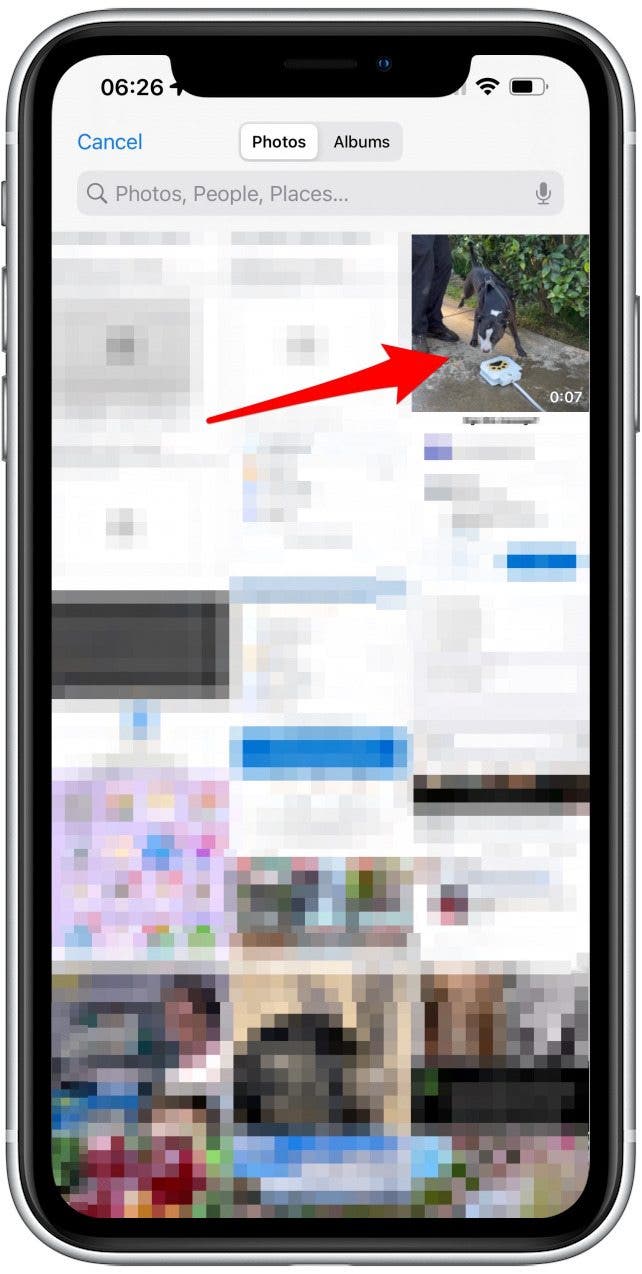
- Select the file you wish to use. I will be using a video for this example.
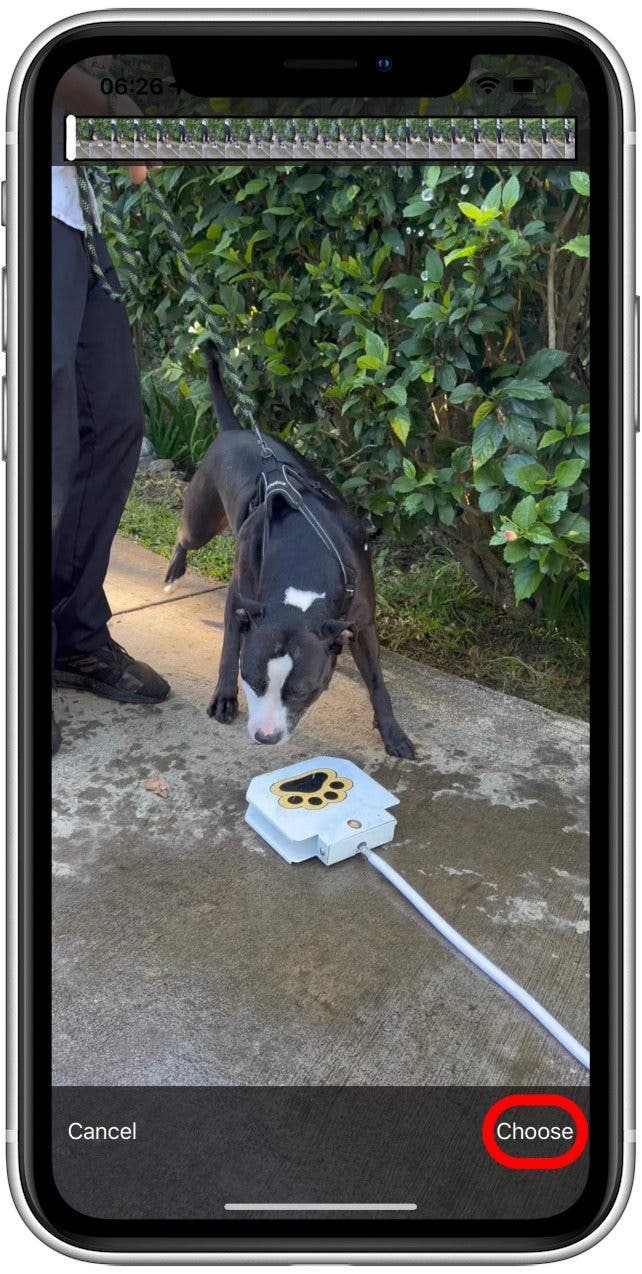
- Tap Choose. Your video will take some time to compress.
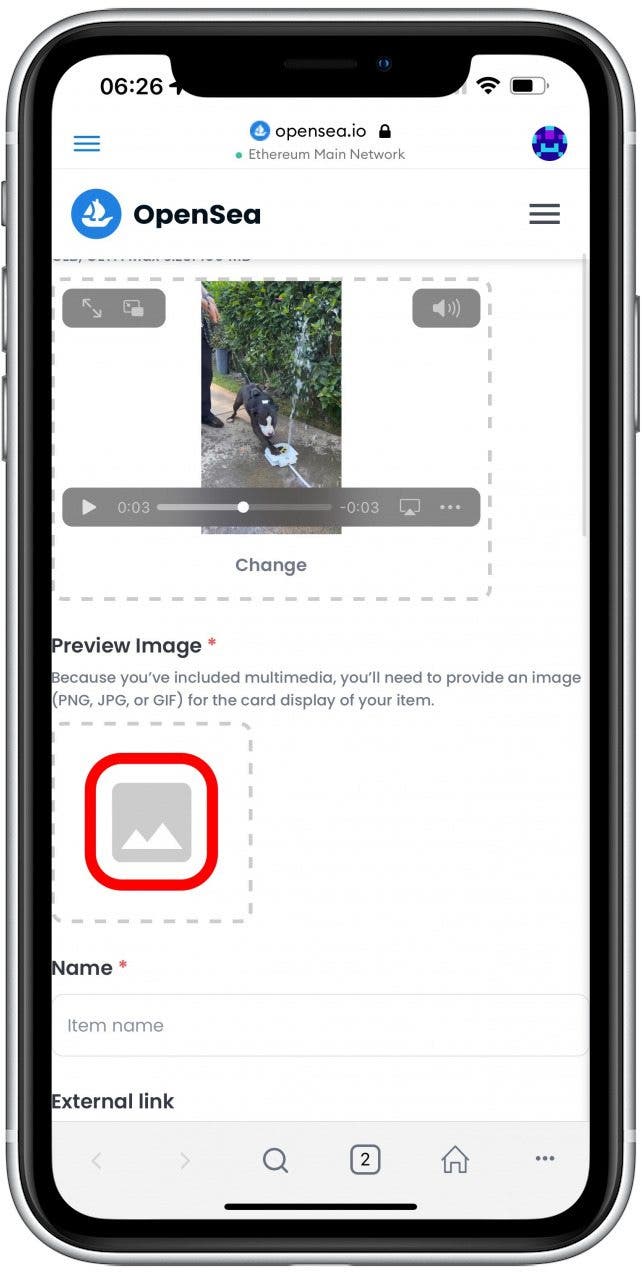
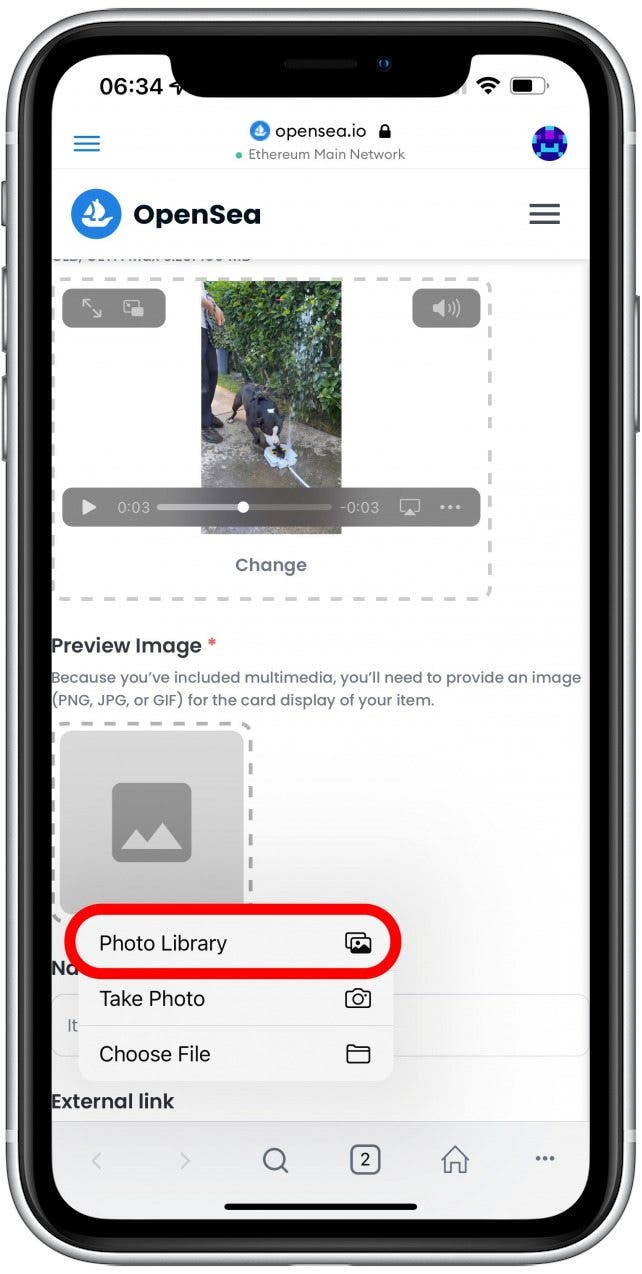
- If you selected a still image, you’d be able to proceed straight to naming your NFT. Since this is multimedia, you’ll need to choose a PNG, JPG, or GIF for the Preview Image. I’ll explain how to do this in the Video NFT Tips section below. If you’re ready to add it, tap the image icon.
- Tap the location of the image.
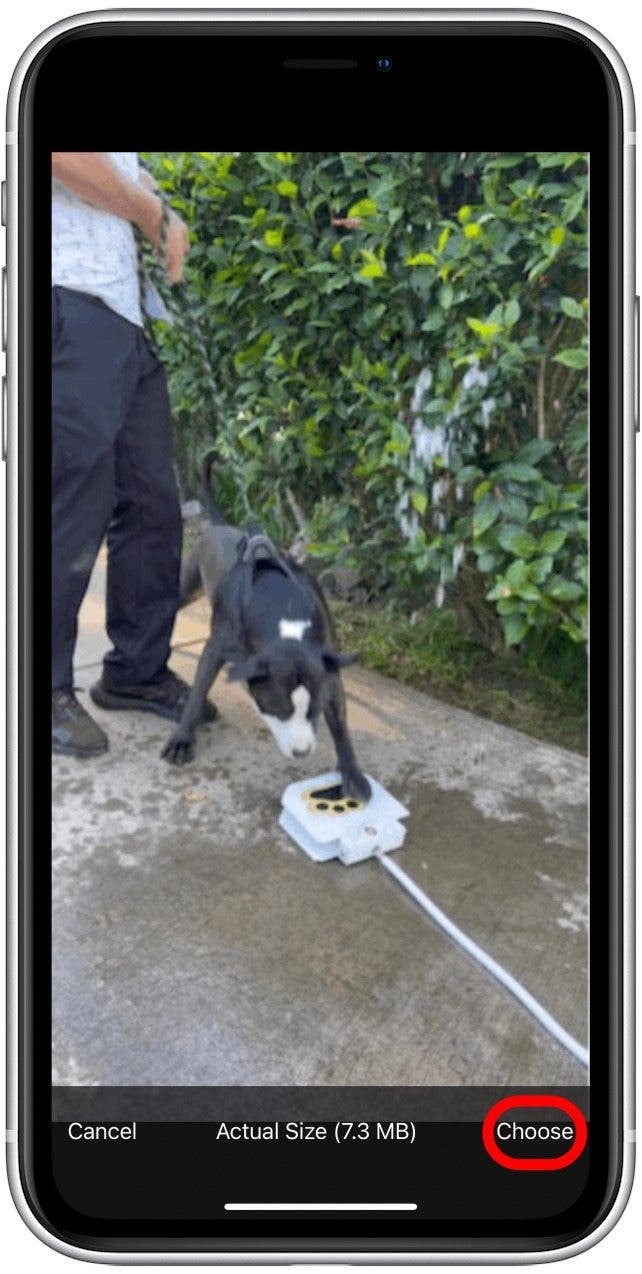
- Select the image you wish to use.

- Tap Choose.
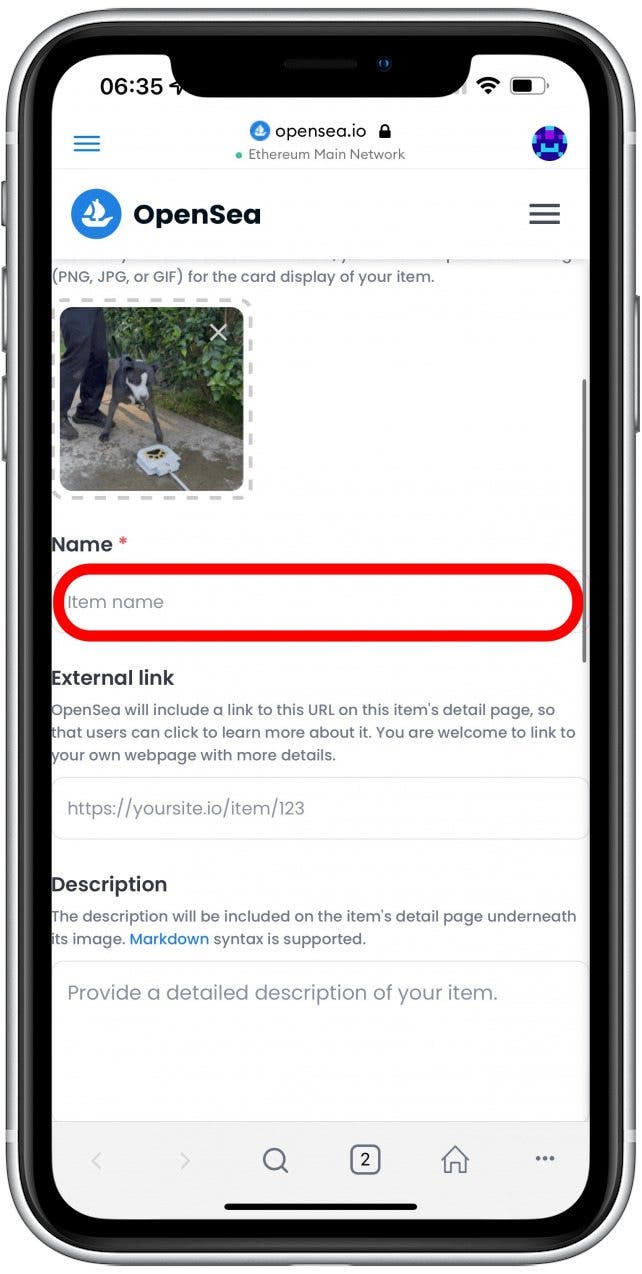
- Next, name your NFT.
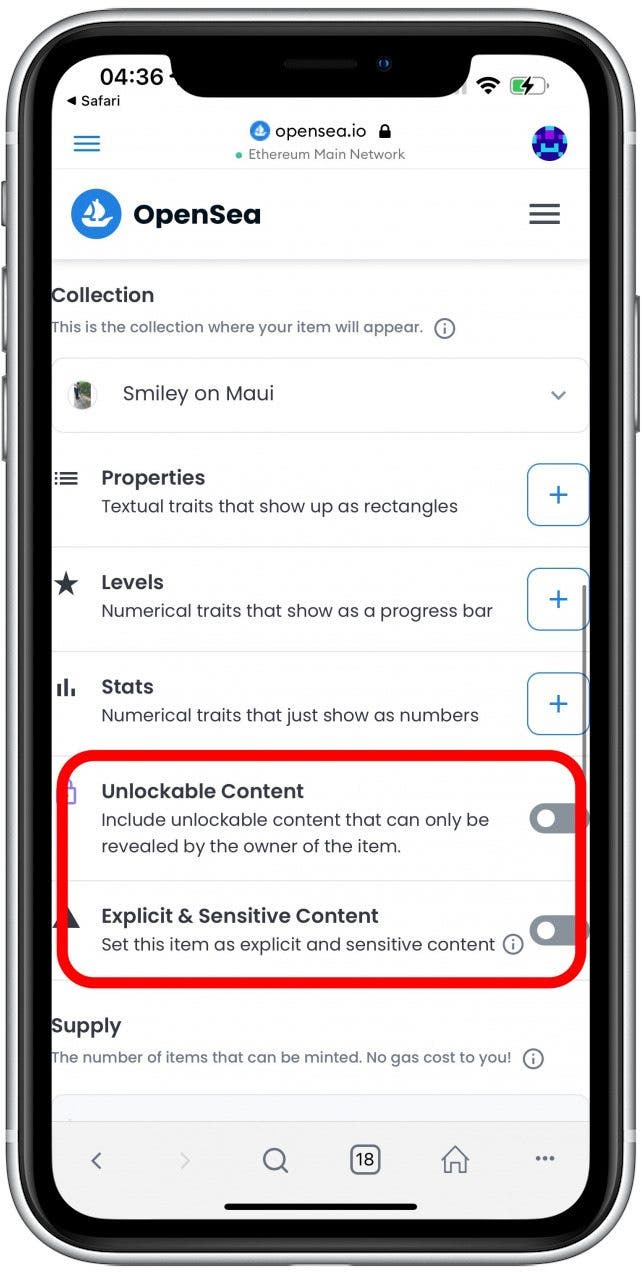
- Adding an external link, description, collection, properties, levels, and stats is optional. You can learn more about each section by tapping on the i icon.
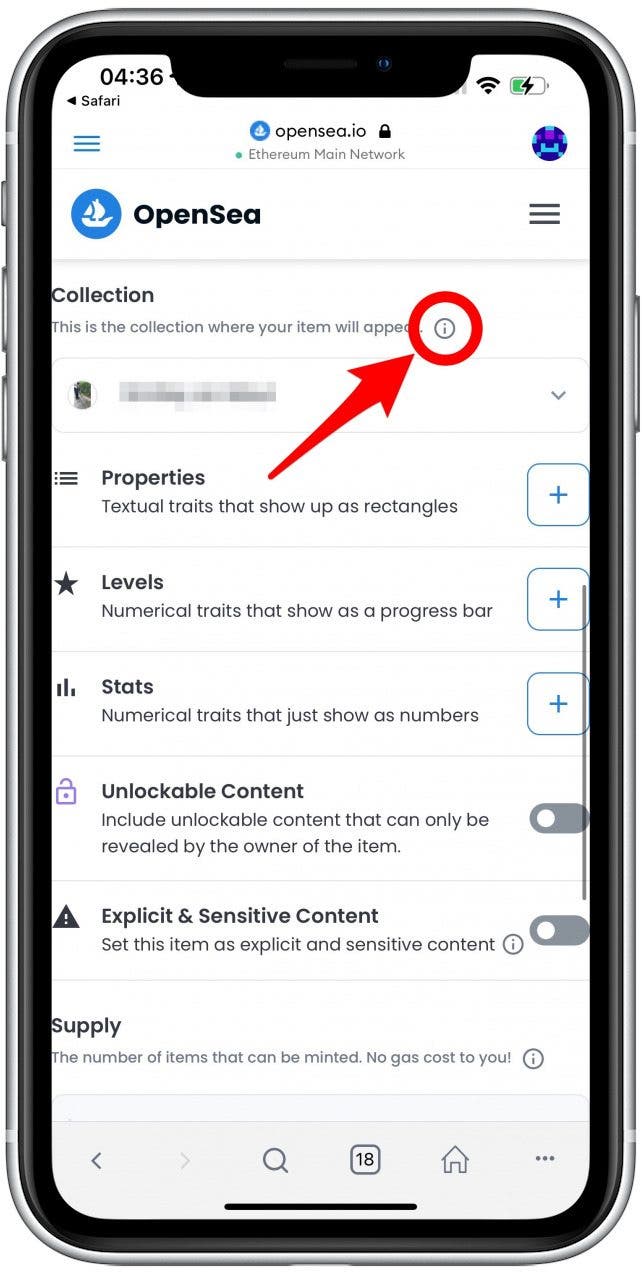
- You can also decide if you wish to toggle on Unlockable Content and Explicit & Sensitive Content.
- Under Blockchain, Ethereum is the default option. You can select a different option if you wish.
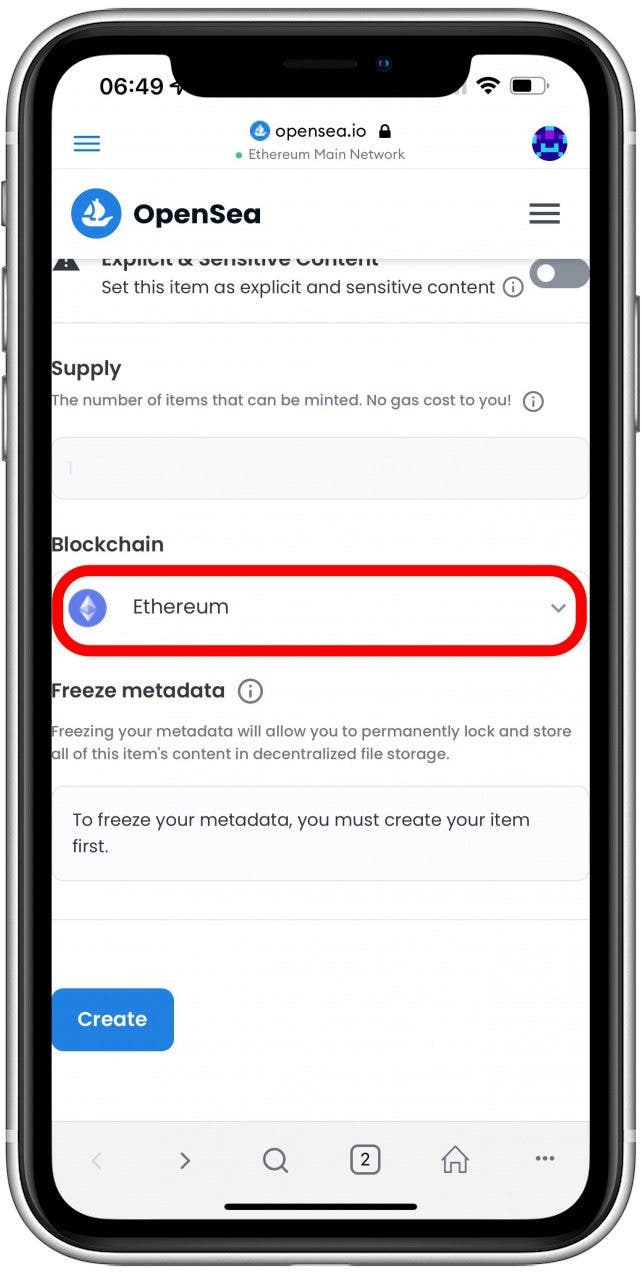
- Tap Create.

- Your NFT is live!
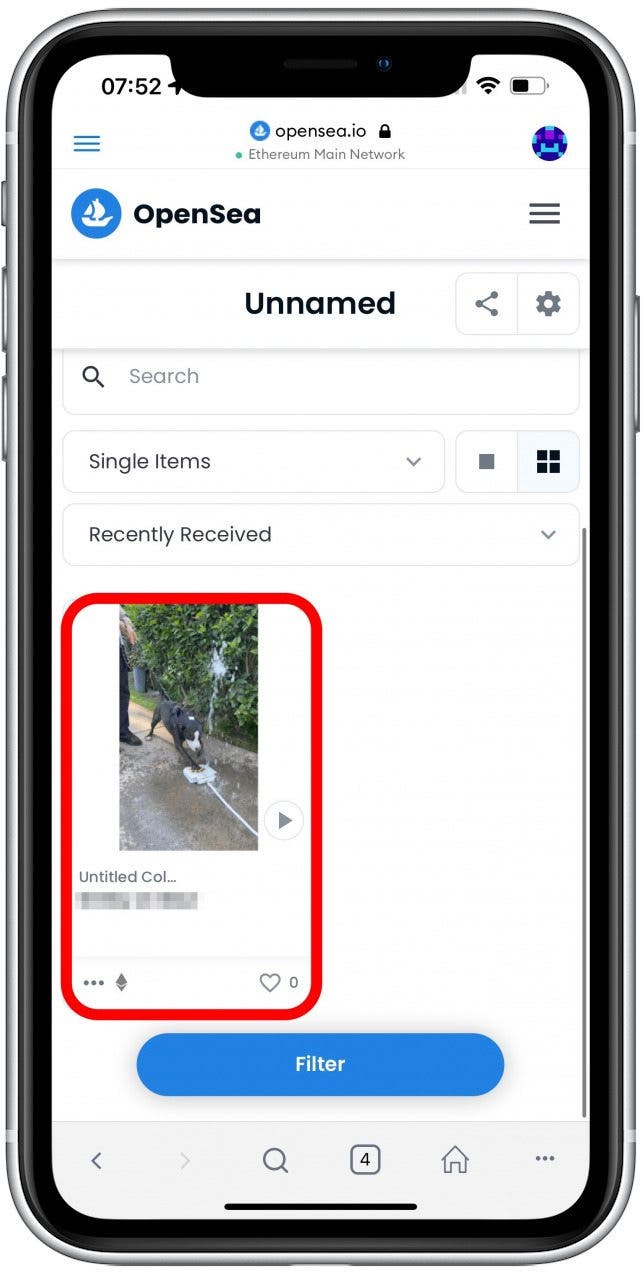
Your NFT is officially lazy minted! This means that others on OpenSea can already see it on the marketplace and make offers. They can’t buy it unless you accept their offer. Keep in mind that you can still make changes to it. In order to sell it for a set price, you’ll have to mint it, which requires paying gas fees with cyptocurrencies.
That’s it; now you know how to make an NFT art collection entirely on your iPhone or iPad! This, of course, is the easy part because to have successful NFT auctions or sell NFT art at a direct price is an entirely different challenge.
Just because you can create your own crypto coins and NFT doesn’t mean you should, because success is not guaranteed. I suggest doing a lot more research before venturing into the world of NFTs and crypto. To do this, I recommend starting by exploring OpenSea or other NFT websites and marketplaces.OpenSea is a great NFT art website for creators and buyers, offering valuable tips. If you are seriously interested in being a creator, you should also take the time to learn how to make NFT digital art that actually sells. For this, you’ll have to get familiar with NFT trends and explore NFT apps that help create and sell this form of art. I wish you luck with your NFT projects!

2 Comments Add yours